How to Use the Windward System Five Statements Report
This guide explains how to generate and send customer statements using the Statements Report in Windward System Five. Statements help you track outstanding balances and communicate account status to customers.
What Is the Windward Statements Report?
The Statements Report in Windward System Five allows you to generate a list of customer statements that show:
- The total amount outstanding
- How long the accounts have been outstanding
Statements do not show full transaction details, but you can optionally include invoice line detail using your Statement Form Design settings.
Windward Statements Report Steps
Step 1: Access the Statements Report
- Open Windward System Five.
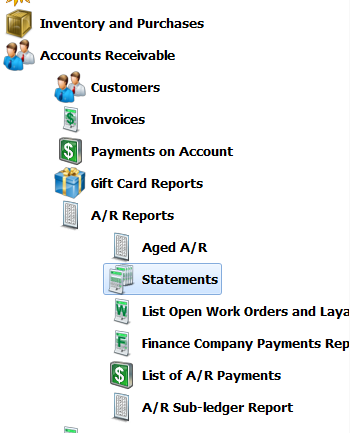
- Go to Accounts Receivable > A/R Reports > Statements.
Step 2: Apply Credit Invoices
Important: Ensure that you have applied all credit invoices before running statements. This ensures accurate balances are shown on customer statements.
See: Apply A/R Credits on Account
Step 3: Print or Send Statements
Within the Statements Report window, use the Print button to process customer statements. This button provides multiple delivery options:
- Use the Print Status button to set all statements to print.
- Click Print to:
- Email all statements to customers with email addresses (marks them as processed).
- Fax all statements to customers with fax numbers (marks them as processed).
- Print remainder to send any remaining unprocessed statements to your printer (marks them as processed).

Windward Statements - Meaning of the Tabs
This includes the tabs along the top of the Statements screen, such as: Setup, National Account Options (Optional), Lookup Words, Messages, Preview.

Setup Tab
This is where you select your initial options for filering the list of statements to create.
| Statement Form | This is where you select the Statement form design to use for the Statement run. Note: The selected form will not be applied to the current Statement run until you press the Preview button. | |||||||||||
| Dates |
| |||||||||||
| Aging Method |
Note: Invoices not considered due will not show in the Statement printout detail or totals The customer balance shown in the Statement preview will display all invoice balances owing; the balance due displayed will be based on the date/book month and aging method chosen. | |||||||||||
| Aging Periods | How you want the customer balances to age. The value of the Aging Periods is in days. (Default 30,60,90) Terminology used in the Statement report: Current: Invoice balances within the Statement Book Month (Less than 30 days old when Aged by Date) Outstanding: Invoice balances prior to the Statement Book Month (30 days or older when Aged by Date) | |||||||||||
| Customer Selection | You can filter the list by Start Customer and Last Customer. That is, you can select a range of customers to print the statements for. Checking the First and Last check boxes, includes all customers (this is the default setting). | |||||||||||
| Minimum Balance | Allows you to select the minimum amount of money owing by a customer before they are automatically flagged to be processed in the report. Manually marking the customer to be processed will override this setting. In Figure 1, any customer that has a balance outstanding over .50 cents will be flagged to have a statement printed. | |||||||||||
| Current Statements | The Current Statements region sets the options for customers who have paid their outstanding balance in the last 30 days.
| |||||||||||
| Outstanding Statements | The Outstanding Statements region sets the options for customers who have not paid their outstanding balance in the last 30 days.
| |||||||||||
| Invoice Copy Options | The Invoice Copy options section provides you the ability to print out copies of the customer's invoices to send with the Statement.
NOTE: Printing of invoice copies utilizes the Multi-Invoice printing configuration; this needs to be setup for correct bulk printing of forms. A warning is displayed if not configured (Figure 1 Invoice copy options shows this) | |||||||||||
| Options |
| |||||||||||
| Print for Selected Item | This option allows you to choose an inventory item and filter the customer statement list (Displayed balance and invoice details as well) to only those sales containing the selected item. | |||||||||||
| Currency (optional) | This drop down will filter the Statement customer list to those customers setup with the selected currency type. | |||||||||||
| Department (optional) | The System Five department to perform the Statement run for. Only visible in data sets licensed for the Department feature. |
National Accounts Options Tab(Optional)
The National Accounts Options tab allows you to select whether you want to include subsidiary accounts included with the national account on one statement or print separate statements for the subsidiaries. A subsidiary account can also have one or more accounts associated to it as subsidiaries.
Statements can be printed for individual subsidiaries or can be printed for the national account, however, if there are 3 levels of subsidiaries, you can not print a statement for the level 2 and 3, just level 1 or individuals.
Invoices are normally made to the subsidiary customer account, whereas, statements and payments are made by the parent or national account. The feature must be enabled in the Setup Wizard for this tab to appear.
Lookup Word Tab
You can choose to sort by Lookup Words if you wish. For more in depth sorting with these words you can use the None, Or, And, and Not boxes to narrow your report down further. 
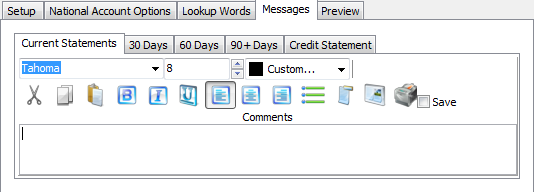
Messages Tab
Within the Messages tab you can set exactly what kind of message you want to appear on each kind of statement. With the All Statements you can have a message that appears on every statement that you print, such as "Don't forger our March 12th Spring Sale!" You might want to create different statements for the outstanding accounts, for 30 Days, it might be "We would like to remind you that your account is overdue". You would want something stronger for 60 Days, and perhaps stronger wording still for accounts that are 90 Days outstanding. The tab Credit Statement is where you choose what kind of message you would like to appear on a statement for customers who have a credit on their account.
Preview Tab
The Preview Tab shows who the statements are being generated for. You can see the Customer, their Current Balance, the Total Due, and the Age (in Days) that the account is outstanding. The Print columns shows you what is selected to be processed (green checkmark), not processed (red X) or already processed (printer icon).
You can click these Print icons to toggle the state; The Print and Print Status buttons on the Toolbar can be used to adjust these as well.

Faxing Statements First make sure that the Fax printer is defined as a WinFax or MS Fax printer in the System Five Printer Setup.
To print the statements that have fax numbers, select Print, then select Fax all statements that have fax numbers.


